
If you've harvested your cannabis and need to dry it effectively, you might be facing a bit of a challenge. Drying cannabis in brown paper bags is an age-old technique trusted by many growers.
This article will guide you through using paper bags to dry your buds perfectly, preserving flavor and potency.
Keep reading for the know-how that'll ensure top-notch results.
Key Takeaways
- Drying cannabis in paper bags helps control moisture and preserves flavor by absorbing excess water and allowing airflow.
- To dry cannabis properly, use brown paper bags, check humidity with a hygrometer, shake gently daily, and avoid overcrowding the buds.
- The drying process should take 2 to 3 days until buds feel dry outside but slightly sticky inside; aim for around 62% humidity before curing.
- Comparing methods, paper bag drying requires less space than hang drying and is suitable for small quantities but needs careful monitoring to prevent mold.
- Drying affects weed quality; gentle drying in paper bags can protect terpenes better than hang-drying whole branches.
Does Drying Cannabis in a Paper Bag Work?
Yes, using paper bags to dry cannabis is both popular and effective.
This method allows for a slow, controlled drying process. The goal is to preserve the cannabinoids like THC-A and prevent mold growth by maintaining proper humidity.
Brown paper bags help do this because they absorb excess moisture while letting air flow around the buds. Experienced growers often use hygrometers inside the bags to monitor humidity levels closely.
Drying in paper bags also helps preserve terpenes essential for flavor and aroma. When done right, cannabis can taste better and have a more potent smell.
Remember to keep the bags in a climate-controlled space with steady temperatures to ensure an even drying process without mold ruining your harvest.
Now, let's explore how you go about drying cannabis in these brown paper saviors.
ALSO READ: Cannabis Deficiencies: Everything You Need To Know
The Process of Drying Cannabis in a Paper Bag
Drying cannabis in paper bags isn't just a myth—it's a nuanced method that can yield exceptional results when executed correctly.
The section below delves into the craft of carefully preserving your harvest, guiding you through each critical step to ensure your buds are perfectly primed and ready for optimal enjoyment.
When to Dry Cannabis
Knowing the right time to dry cannabis ensures the best quality. You monitor your plants closely and start drying when they're ripe.
1. Check the Trichomes
Trichomes are tiny, hair-like structures on cannabis flowers that contain the plant's active compounds, such as THC and CBD. To examine the color of these trichomes, use a magnifying glass or a jeweler's loupe.
They should appear milky white or amber. Clear trichomes indicate that the plant is not yet ready for harvest, as they still contain immature cannabinoids.
Harvesting when trichomes are milky white or amber ensures that you capture the peak potency and flavor of your cannabis.
2. Squeeze the Buds Gently
The texture of the buds is another essential factor in determining readiness for drying. Gently squeeze the buds between your fingers.
They should not feel too squishy or soft. Instead, look for a slight resistance that indicates the buds have matured enough to contain the right amount of moisture.
If the buds are too soft, they may still be too wet, leading to mold development during the drying process.
ALSO READ: Cannabis Leaves Turning Yellow? Here’s How to Save Your Plants
3. Observe the Pistils
Pistils are hair-like structures that protrude from the buds. They initially appear white and gradually darken as the plant matures.
When approximately 70% to 80% of the pistils have darkened and curled inwards, it's a sign that the plant is ready for harvest.
This change in appearance indicates that the plant's energy has shifted from growth to the production of cannabinoids and terpenes, making it the ideal time to begin the drying process.
4. Pay Attention to the Branches
Another important indicator of readiness is the flexibility of the branches.
As the plant matures and loses moisture, the branches should snap slightly when bent. This snapping indicates a lower moisture content, essential for preventing mold and ensuring a smooth drying process.
If the branches are still flexible and bend without snapping, the plant may still be too wet for harvesting and drying.
5. Look for Yellowing Leaves
As cannabis plants reach maturity, the leaves near the buds often begin to yellow.
This yellowing is a natural part of the plant's life cycle and signals that it is diverting energy away from photosynthesis and toward the development of cannabinoids and terpenes.
When you observe yellowing leaves around the buds, it's a clear indication that your cannabis is ready to be dried.

How to Dry Cannabis
Drying cannabis properly is essential to preserving its quality and potency. Using paper bags for drying is a straightforward and effective method that helps control humidity levels and prevents your buds from drying too quickly.
This approach ensures that your cannabis retains its flavor, aroma, and cannabinoid profile, making it an excellent choice for both novice and experienced growers.
Here's how to dry your cannabis using paper bags, along with some important tips to ensure success.
1. Choose the Right Time for Drying
The first step in drying cannabis using paper bags is to choose the right time to begin the process.
This is typically done after harvesting and trimming the plants. Once the plants have been trimmed, they are ready for drying.
This timing is crucial to maintaining the buds' quality, as it ensures they are at the peak of their potency and flavor.
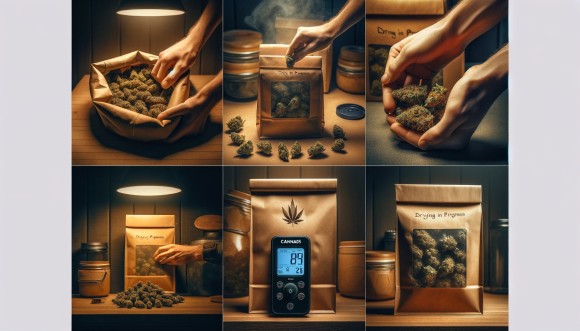
2. Prepare the Paper Bags
Select brown paper bags that are large enough to hold your cannabis without squishing it.
The bags should be sturdy and free from ink or coatings that could contaminate the buds.
Brown paper bags are ideal because they allow for adequate air circulation while protecting the buds from excessive light exposure, which can degrade the cannabinoids and terpenes.
3. Cut or Break the Cannabis into Smaller Pieces
Before placing your cannabis into the bags, cut or break it into smaller pieces that will fit easily.
This step ensures that the buds are not overcrowded and that each piece has enough space to dry evenly. Overcrowding can lead to uneven drying and increase the risk of mold development.
4. Place Cannabis in the Paper Bags
Place a single layer of cannabis at the bottom of each paper bag. Do not overcrowd the bags, as this can impede airflow and increase the risk of mold.
Each bud should have enough space to allow air to circulate it, promoting even drying.
5. Maintain Air Circulation
Roll the tops of the paper bags down once or twice, but leave them open enough to allow for air circulation.
This step is crucial to ensure that moisture can escape from the bags while still protecting the buds from contaminants.
Proper air circulation helps prevent mold and ensures the buds dry evenly.
ALSO READ: Cannabis Leaves Curling Up? Do This To Fix The Problem
6. Monitor Daily for Mold and Rot
Check your cannabis daily for signs of mold or rot. Scrutinize each bud, and if you notice any issues, remove the affected pieces immediately to prevent the spread of mold.
Regular monitoring is essential to maintaining the quality of your cannabis.
7. Shake the Bags for Even Drying
During each daily check, gently shake the bags to allow different sides of the buds to be exposed to air. This simple action helps to promote even drying by ensuring that all parts of the buds have access to airflow, reducing the risk of moisture buildup.
8. Manage Humidity Levels
Keep an eye on the humidity levels in the environment where you are drying your cannabis.
High humidity can lead to mold growth, so consider using dehumidifiers to maintain a dry environment around the bags. The ideal humidity level for drying cannabis is around 45% to 55%.
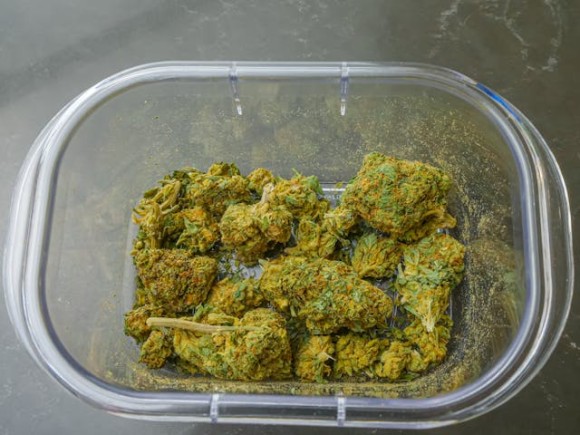
9. Assess the Dryness of Your Cannabis
Let your cannabis sit in the bags for 2 to 3 days until it feels dry on the outside but still slightly sticky inside.
This balance indicates that the buds have reached the right dryness level without becoming too brittle. The sticky interior suggests that the cannabis has retained its essential oils and cannabinoids.
10. Prepare for Curing
Once the desired dryness is reached, typically around 62% humidity, seal your cannabis for curing.
Curing is a critical step that enhances the flavor and potency of the buds. Transfer the dried cannabis to airtight containers, such as glass jars, and store them in a cool, dark place.
Open the jars periodically to release moisture and allow the buds to breathe.
ALSO READ: Kush Mint Strain Exposed: Unveiling its Rare and Unique Attributes
Tips for Optimal Drying
Getting your cannabis to dry just right is crucial for preserving its potency, flavor, and overall quality. The paper bag method is a simple yet effective way to achieve this, but the key lies in how you use the bags.
Here’s a detailed guide on optimizing the drying process with paper bags.
1. Choose the Right Environment
The environment where you dry your cannabis plays a significant role in the quality of the final product. Look for a cool, dark place where you can control the temperature and humidity.
A consistent environment helps prevent fluctuations that could affect the drying process.
Ensure that this spot is away from direct sunlight, which can degrade the terpenes and cannabinoids in your hash. Protecting these compounds is essential for maintaining the aroma, flavor, and potency of your cannabis.
2. Use Quality Paper Bags
Opt for sturdy brown paper bags that allow air to pass through. These bags are ideal because they help absorb excess moisture from your cannabis while providing a breathable environment for even drying.
The natural material of brown paper bags helps prevent mold and mildew, ensuring your cannabis dries at the right pace.
3. Leave Space at the Top
When using paper bags for drying, it's important not to seal them completely. Leave the tops open to allow for some airflow. Proper ventilation is crucial in preventing moisture buildup, which can lead to mold development.
Allowing air to circulate ensures that the drying process remains controlled and effective.
ALSO READ: Exploring the Essence of Sour Diesel Strain: From Bud to Indoor Plantation
4. Avoid Overcrowding
Place a thin layer of cannabis flowers in each bag to ensure they dry evenly.
Overcrowding the bags can lead to uneven drying and increase the risk of mold. Each bud should have enough space to allow air to circulate it, promoting uniform drying and preserving the quality of your cannabis.
5. Check Humidity Levels
Monitoring humidity levels is essential to achieving the perfect dryness for your cannabis. Use a hygrometer to keep an eye on the moisture content of your buds. Aim for around 62% humidity before sealing them for curing.
This level of humidity ensures that your cannabis is dry enough to prevent mold but still retains the necessary moisture for smooth curing.
6. Shift Positions Gently
To promote even drying, gently shake or turn the buds daily.
This simple action helps prevent the buds from sticking together and ensures that all sides of the flowers receive adequate airflow. By shifting their positions, you can avoid moisture buildup and encourage consistent drying throughout the batch.
7. Be Patient
Patience is key when drying cannabis. Rushing the process can ruin your hard work and lead to poor-quality buds. Allow the buds to dry slowly and naturally, which helps preserve their flavor, aroma, and potency.
Taking the time to dry your cannabis correctly ensures a better-quality final product that you can enjoy.
The Impact of Drying on the Quality of Cannabis
Drying cannabis the right way keeps it from getting moldy and losing its power. If buds are dried too fast, they can lose their smell and taste. The terpenes that give cannabis its unique scent need gentle drying to stay strong.
Slow and careful drying in a climate-controlled space helps preserve these terpenes.
The quality of your weed relies a lot on how you dry it. Hang-drying has been around for ages, but sometimes it doesn't work evenly, leaving some parts over or under-dried. Using a paper bag lets air flow around the bud, leading to more consistent drying.
This method could also protect those precious terpenes better than hanging up whole branches does.
Wrapping up
Drying cannabis in a paper bag is simple and effective. Keep an eye on humidity, and don't rush the process.
Remember to shake the buds daily for even drying. With patience, you'll preserve your weed's quality and potency.
Give it a try, and see how this method works for you!
Frequently Asked Questions (FAQs)
1. Can I dry cannabis in a paper bag?
Yes, you can dry cannabis in a paper bag. This method helps control the climate around your buds and keeps them from quickly drying.
2. What's the best way to set up for drying cannabis in a paper bag?
Start by finding a cool, dark place with good airflow. Then, put your trimmed buds into the paper bags loosely; don't pack them tight!
3. How long does it take to dry cannabis this way?
Drying time varies but typically takes about 3-7 days. You'll want to check on your buds often—once they feel dry on the outside but still slightly springy when squeezed, they're ready.
4. Should I worry about mold when using a paper bag for drying?
You should always be aware of mold! Ensure your area is well-ventilated and that you check your cannabis regularly for any signs of dampness or mold growth during the drying process.
This article was last updated on August 3, 2024, to expand on the sections and make other changes for relevance.